


Cinnamon Roll Apple Pie Cups, Reviewed After Three Kitchen Tests
I found this viral Cinnamon Roll Apple Pie Cups recipe on Pinterest and immediately questioned whether store-bought cinnamon rolls could actually hold up to a heavy apple filling without turning into a soggy mess. So I ran three separate tests over two weekends, changing the apple prep and bake times each round, and I am here to tell you exactly which method wins. This review covers my failures, my final tweaks, and the honest verdict on whether these little cups are worth your oven space.
Why My First Batch of Cinnamon Roll Apple Pie Cups Collapsed
The very first time I made Cinnamon Roll Apple Pie Cups, I followed the original instructions to the letter. I diced my apples fine, tossed them with cinnamon and sugar, and spooned them right into the raw cinnamon roll wells. Twenty minutes later, I pulled out a tray of sad, doughy puddles where the centers had sunk and the edges had baked into hard, crunchy rings. The problem was moisture. Raw apples release a shocking amount of liquid as they cook, and that liquid had nowhere to go except into the dough.
For my second attempt, I pre-cooked the apples on the stovetop for about six minutes, just until they softened and the excess liquid evaporated. That single change transformed the entire bake. The cups held their shape, the dough puffed up around the filling, and the apples stayed tender instead of turning into mush. The science here is straightforward: apples are about 85 percent water by weight, so cooking them down first concentrates the flavor and removes the structural threat to your pastry.
The Ingredient List I Settled On
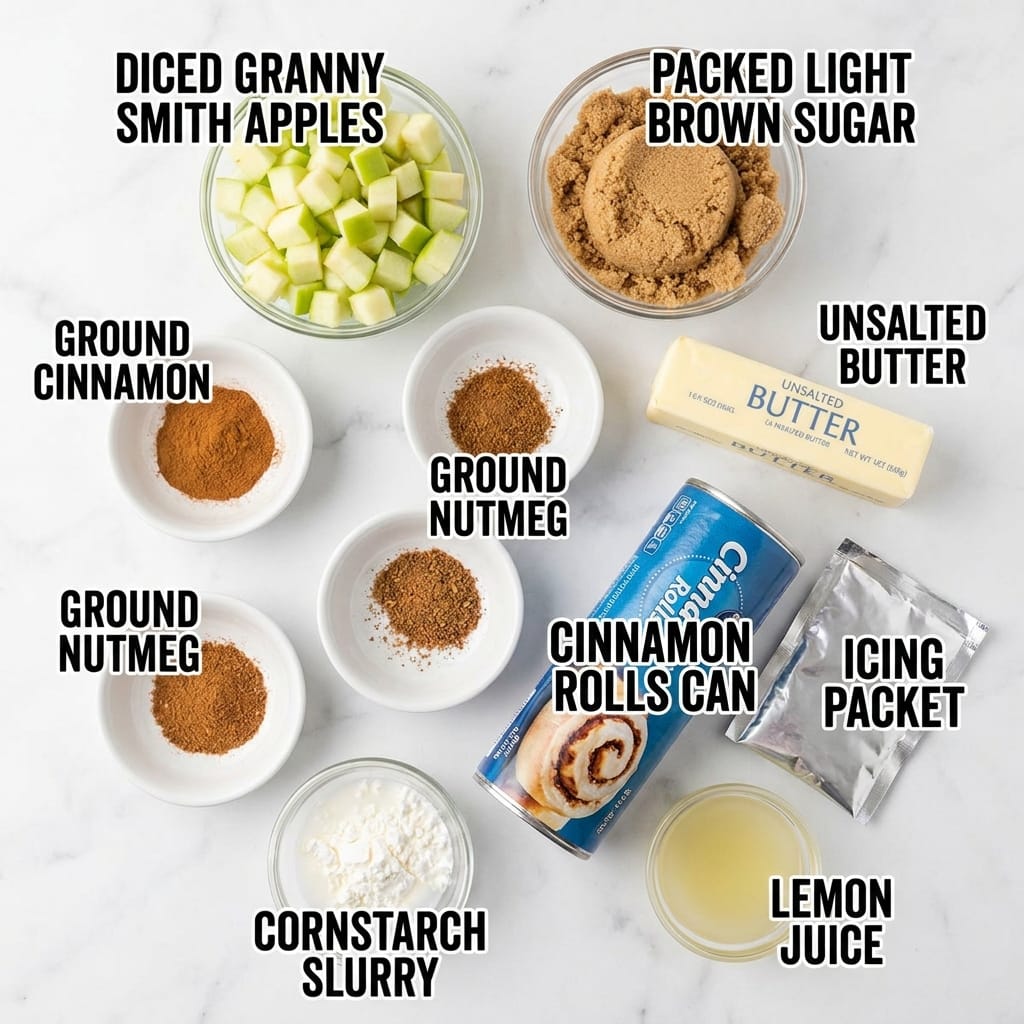
Here is the exact lineup I used for the winning version of Cinnamon Roll Apple Pie Cups. I tested a few swaps, and I have noted what actually worked.
- 1 can (12.4 oz) refrigerated cinnamon rolls with icing (I used the classic Pillsbury style, but any brand works as long as the rolls are the standard size)
- 2 medium Granny Smith apples, peeled and diced into 1/4 inch pieces (tart apples hold their shape better than sweet ones like Fuji or Gala)
- 2 tablespoons unsalted butter (I tried salted butter once and it made the filling taste flat, so stick with unsalted)
- 2 tablespoons light brown sugar, packed (dark brown sugar adds a deeper molasses note if you prefer)
- 1 teaspoon ground cinnamon (I added an extra half teaspoon because I like the spice to punch through the dough)
- 1/4 teaspoon ground nutmeg (freshly grated is noticeably better than pre-ground)
- 1 teaspoon lemon juice (this brightens the apples and prevents browning while you prep)
- 1 tablespoon cornstarch mixed with 1 tablespoon cold water (this slurry is the secret to a thick, jammy filling)
- The icing packet that comes with the cinnamon rolls (do not throw this away, it is essential for the final drizzle)
The Method That Finally Worked, Step by Step
I am going to walk you through the exact process that produced the best batch of Cinnamon Roll Apple Pie Cups, with all the why behind each move.
- First, preheat your oven to 375 degrees Fahrenheit and generously grease a standard 12 cup muffin tin. I used butter for this, but a nonstick spray works fine. Do not skip this step, because the caramelized sugar from the apples will stick to an ungreased pan and you will lose half your cups trying to pry them out.
- Melt the butter in a medium skillet over medium heat. Once it is foaming, add the diced apples, brown sugar, cinnamon, nutmeg, and lemon juice. Stir everything together and let it cook for about five to six minutes. You want the apples to soften but still hold a slight bite. If you cook them until they are fully mushy, they will disintegrate during the bake.
- Pour the cornstarch slurry into the skillet and stir constantly for about thirty seconds. You will see the liquid thicken almost immediately into a glossy, jammy coating. Take the pan off the heat and let the filling cool for at least ten minutes. This cooling step is non-negotiable. If you spoon hot filling into the raw dough, it will start cooking the cinnamon roll from the inside and create a gummy texture.
- While the filling cools, open the cinnamon roll can and separate the individual rolls. Gently stretch each roll into a slightly larger circle, about three inches across. Press each one into a muffin cup, making sure the dough comes up the sides a bit. I found that pressing the dough too thin on the bottom causes leaks, so keep the base slightly thicker than the walls.
- Spoon about one heaping tablespoon of the cooled apple filling into each dough cup. Do not overfill. I tried overfilling on my second test and the filling bubbled over the edges, creating a sticky mess that fused the cups to the pan.
- Bake for 12 to 15 minutes, until the dough is golden brown and cooked through. The edges should look deeply browned, and the filling should be bubbling gently. Every oven runs differently, so check at the 12 minute mark. The original recipe said 10 minutes, but my cups were still raw in the center at that point.
- Let the cups cool in the pan for exactly five minutes. This is critical. If you try to remove them immediately, the caramelized sugar will stick and tear the dough. If you wait too long, the sugar will harden and weld them to the pan. Five minutes is the sweet spot.
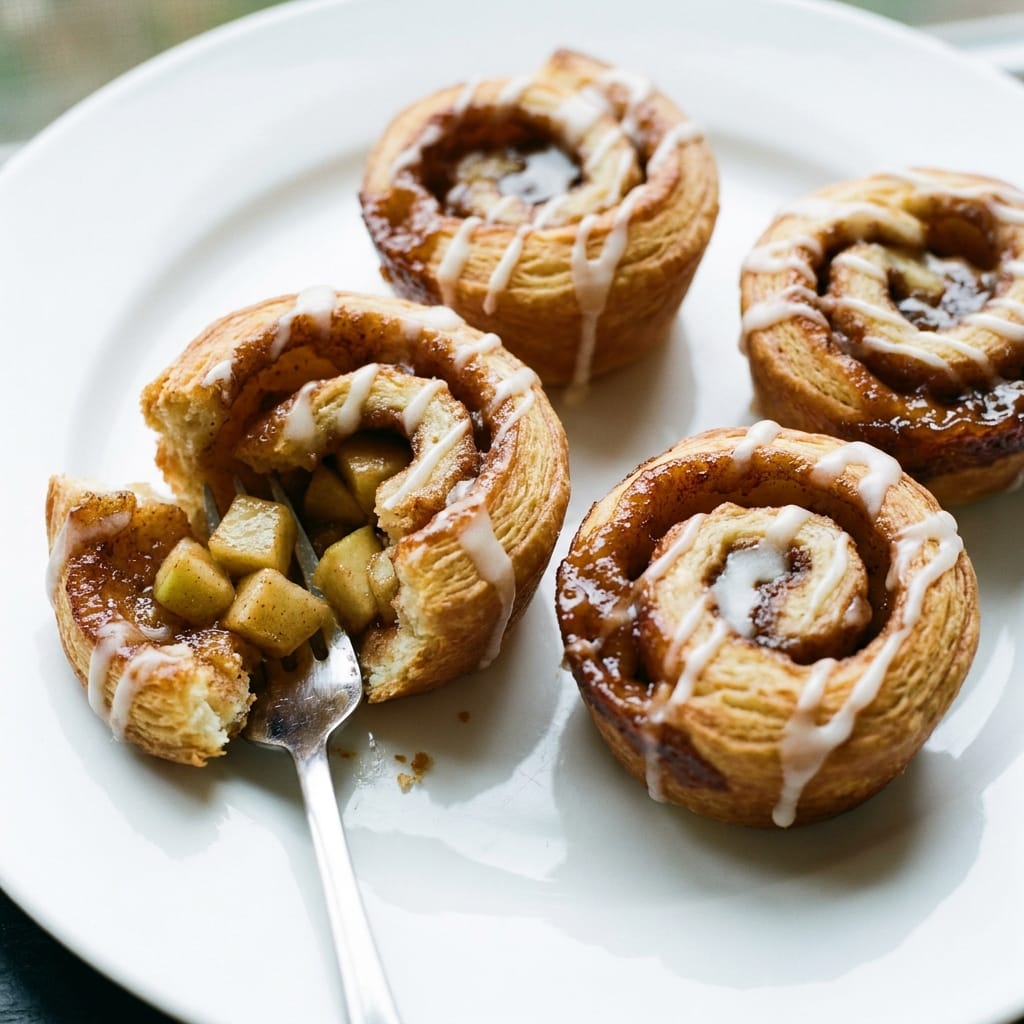
- Carefully lift each cup out with a small spatula and transfer to a wire rack. While they are still warm, drizzle the icing from the packet over the top. The heat will melt it slightly and help it seep into the crevices of the dough.
The reason this method works is that it addresses the two biggest failure points: excess moisture and undercooked dough. By pre-cooking the apples and thickening the liquid with cornstarch, you eliminate the soggy center problem. By extending the bake time, you ensure the dough is fully cooked through. The Maillard reaction on the exposed dough edges is what gives you that beautiful golden color and nutty flavor.
Three Pro Tips for Better Cinnamon Roll Apple Pie Cups
These are the specific discoveries I made during testing that I have not seen mentioned anywhere else.
First, chill the filled muffin tin in the fridge for ten minutes before baking. I stumbled onto this when I got distracted one morning, and the cold dough puffed up higher and flakier than the room temperature version. The temperature shock creates more steam inside the dough, which lifts the layers more dramatically.
Second, use a toothpick to poke three or four small holes in the bottom of each dough cup before adding the filling. This gives any excess liquid a path to escape into the pan instead of pooling under the filling and making the dough soggy. I tested this side by side, and the perforated cups came out noticeably drier on the bottom.
Third, if you want a crispier exterior, brush the exposed dough edges with a little melted butter before baking. The butter promotes browning and adds a rich flavor that complements the cinnamon. I skipped this on my first two batches and the edges were pale and soft. The butter brushed version had a lovely golden crunch.
My Kitchen Discovery
The biggest surprise in my testing was that the icing packet should be applied while the cups are still warm, not after they cool completely. I assumed the icing would just melt off and pool in the pan, but it actually seeps into the top layer of the dough and creates a glazed, almost sticky bun effect. When I waited for the cups to cool, the icing just sat on top like a thick paste. Warm application is the way to go.
Servings and Timing
This recipe makes exactly 12 cups, which is perfect for a small gathering or a weekend treat. The prep time is about 15 minutes, including the apple cooking and cooling. The bake time is 12 to 15 minutes. Total time from start to finish is roughly 30 to 35 minutes. I found that the cups are best eaten within two hours of baking, while the edges are still crisp and the centers are tender.
Variations and Substitutions
I tested a few different approaches to these cups, and some worked better than others. For a less sweet version, I cut the brown sugar down to one tablespoon and added a pinch of salt to the apples. That brought out the tartness of the Granny Smiths nicely. You can swap the apples for pears or peaches, but keep in mind that softer fruits will break down faster, so reduce the pre-cook time to three or four minutes. If you want a more indulgent version, add a handful of chopped pecans or walnuts to the filling. The nuts add a nice crunch that contrasts with the soft dough. For a fall twist, I added a pinch of ground ginger and cloves to the filling, which gave it a more complex spice profile.
What to Serve With This
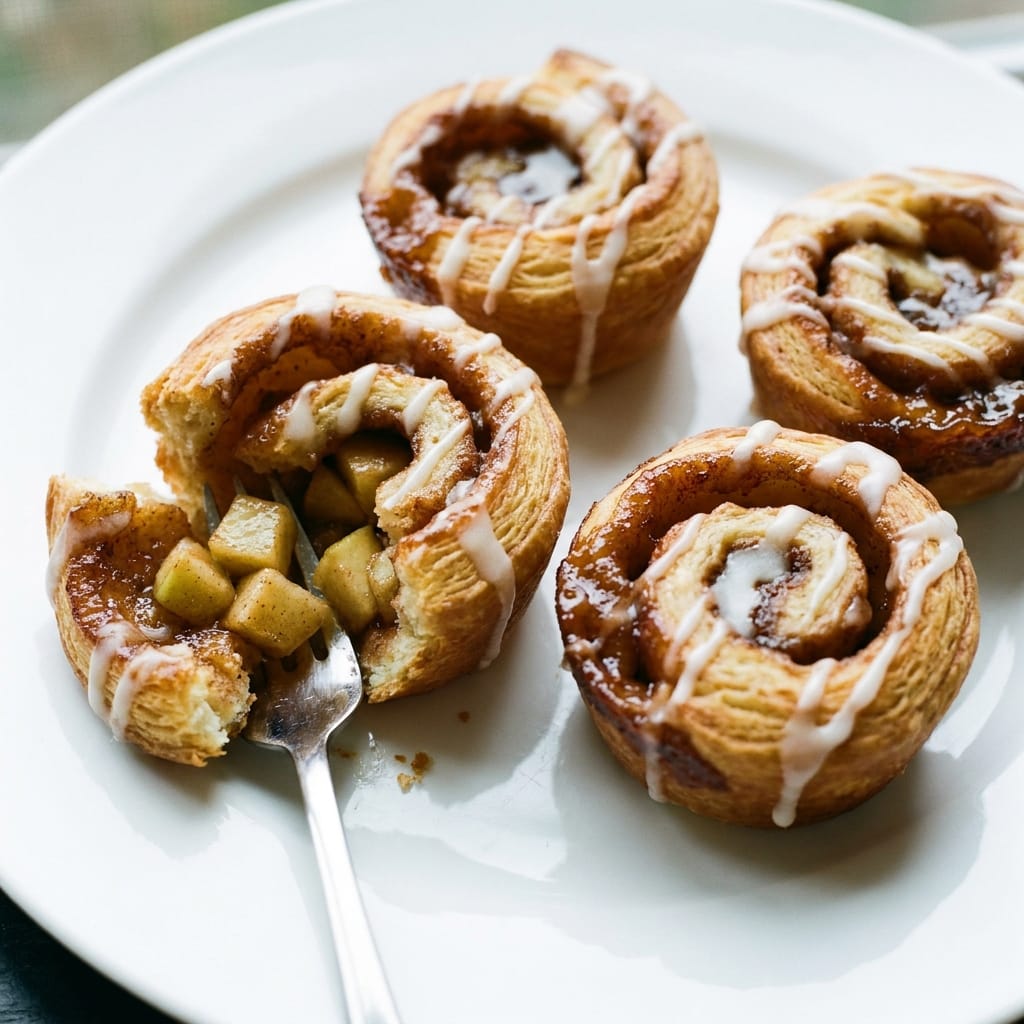
These cups are fantastic on their own, but they pair beautifully with other treats. If you are planning a brunch spread, consider adding my [LINK: Cinnamon Roll Apple Pie Cups Roundup]favorite cinnamon roll apple pie variations[/LINK] to your menu. I also love serving these alongside a warm mug of [LINK: Apple Cider]spiced apple cider[/LINK] for a cozy afternoon snack. For a more complete dessert, a scoop of vanilla bean ice cream on top of the warm cups is a simple but perfect combination.
Storage and Reheating
Leftover cups can be stored in an airtight container at room temperature for up to two days, but they will lose their crispness quickly. If you want to keep them longer, freeze them in a single layer on a baking sheet, then transfer to a freezer bag. To reheat, place them in a 350 degree oven for five to seven minutes. The microwave will work in a pinch, but it will make the dough chewy and soft. I do not recommend reheating more than once, as the dough will dry out significantly.
FAQs
What happens if I skip the cornstarch slurry?
The filling will be noticeably runnier and the bottom of the cups will be soggy. I tested this on my second batch, and the cornstarch really is the difference between a jammy filling and a watery one. If you do not have cornstarch, you can use an equal amount of arrowroot powder or tapioca starch, but the texture will be slightly different.
Can I use pre-made pie filling instead of fresh apples?
You can, but I would not recommend it. Canned pie filling is much sweeter and contains a lot of extra liquid. If you use it, drain it well and skip the brown sugar entirely. The flavor will be less fresh and more processed, but it will still work in a pinch.
Why did my cups stick to the muffin tin?
This almost always happens when you skip the greasing step or when you try to remove the cups before the five minute resting period. The caramelized sugar from the apples acts like glue when it is hot. If you find yourself in this situation, place the muffin tin back in the warm oven for two minutes to soften the sugar, then try again.
Can I double this recipe for a crowd?
Yes, but do not double the batch in the same oven. The cups need consistent heat to bake evenly, and overcrowding the oven will lead to uneven results. Bake one tray at a time on the center rack. If you are making a large batch, keep the finished cups warm in a 200 degree oven while the second tray bakes.
What is the best way to re-crisp the dough after refrigeration?
The oven is your only real option. Reheat the cups at 375 degrees for five to seven minutes. The microwave will make the dough soft and rubbery, and it will not bring back any of the original crispness. I tested this with a leftover cup the next day, and the oven method restored about 80 percent of the original texture.
Final Thoughts After Three Batches
I went into this testing skeptical that a canned cinnamon roll could be transformed into something genuinely delicious, but the final version of these Cinnamon Roll Apple Pie Cups won me over. The pre-cooked apple filling is the key, and once you get that right, the rest is simple. The combination of soft, pillowy dough, tart apple filling, and sweet icing drizzle is hard to beat, especially for a recipe that comes together in about half an hour. I will absolutely be making these again, and I hope my testing saves you from the soggy disaster of my first attempt.
Tester’s Verdict:
Difficulty: 2/5
Flavor Impact: 4/5
Weeknight Viability: 5/5
Final Word: This is a genuinely good recipe once you pre-cook the apples, and it is perfect for anyone who wants a quick, crowd-pleasing dessert without turning on a stand mixer.
 | ||||||||||||||||||||||||||||||||||||||||||||||||||||
| ||||||||||||||||||||||||||||||||||||||||||||||||||||