


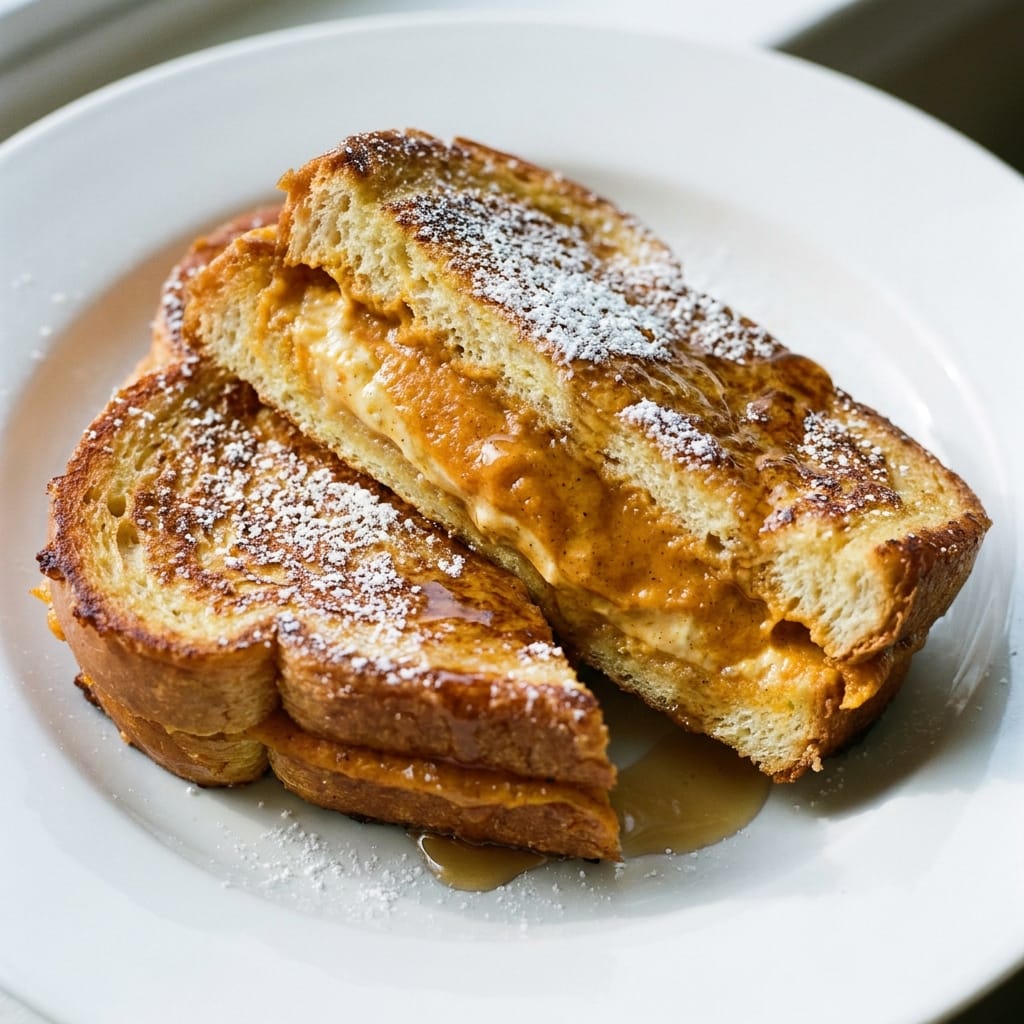
My Rebel Take on Pumpkin Pie Stuffed French Toast
Let me start with a controversial statement: most versions of this viral Pinterest recipe are structurally unsound. The custard turns to soup, the filling leaks out, and you are left with a sad, soggy mess. I spent a week testing every variation of Pumpkin Pie Stuffed French Toast I could find to fix the fundamental texture problems, and I am here to tell you exactly what works and what is a complete waste of your brioche.
Why My Version of Pumpkin Pie Stuffed French Toast Breaks the Rules
The first time I attempted this dish, I followed the popular method of dipping the assembled sandwich directly into the egg custard. It was a disaster. The bread absorbed the liquid too fast, the pumpkin filling became watery, and the whole thing fell apart in the pan. It tasted fine, but the texture was like a savory bread pudding that forgot it was supposed to be breakfast.
I realized the core issue: the custard needs to be thick enough to coat the bread without saturating the filling. I started treating the egg mixture like a batter for a delicate cake, not a soak for bread. This single change altered everything. The outside gets that crisp, golden crust while the inside stays structured and creamy.
I also took a page from the science of custard chemistry. The ratio of egg to dairy is critical. Too much milk and the proteins are too diluted to set properly. I landed on a ratio that creates a custard that clings to the bread like a glove.
Ingredients
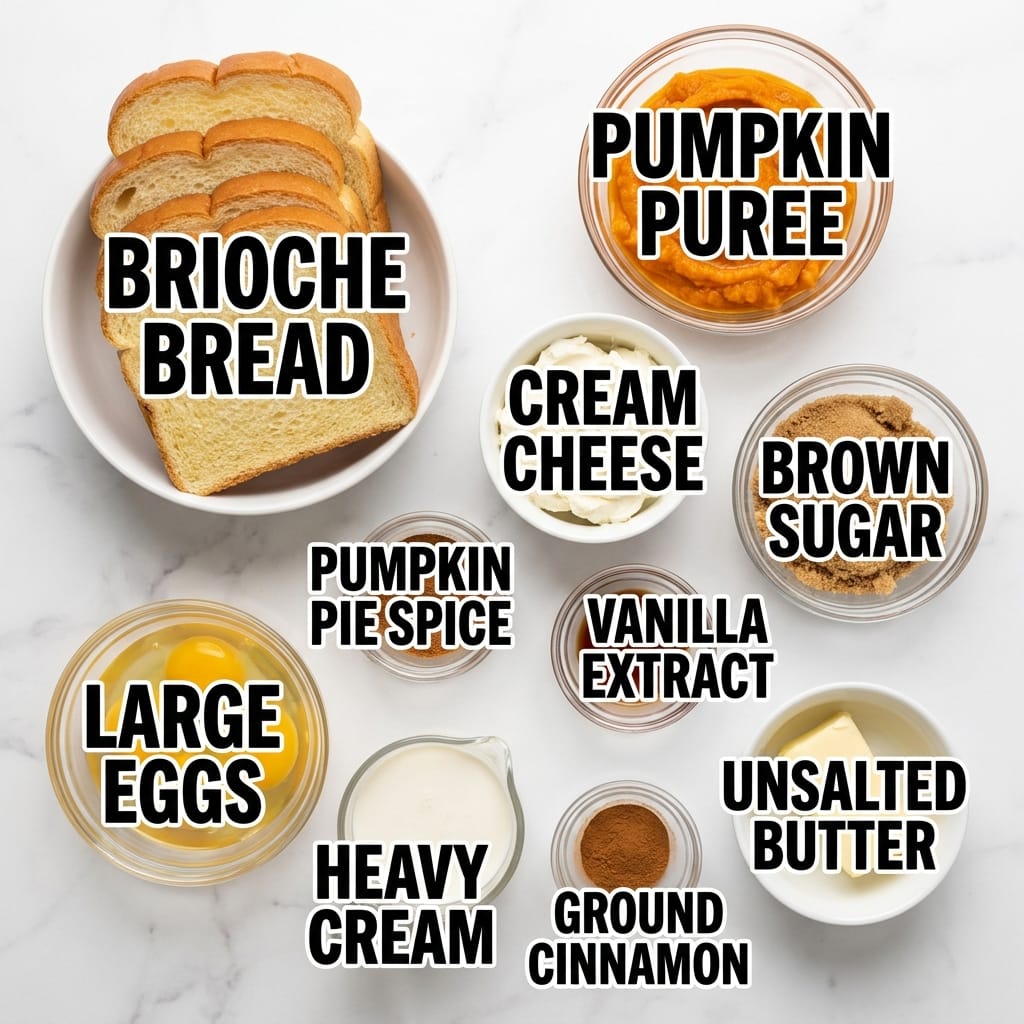
- 8 slices thick-cut brioche or challah (I used a day-old loaf, which is key for structure)
- 1 cup canned pumpkin puree (Not pumpkin pie filling. Make sure it is 100% pure pumpkin or the sugar content will ruin the balance)
- 4 oz cream cheese, softened (I found that full-fat works best here; the low-fat version makes the filling too loose)
- 1/3 cup brown sugar, packed (I reduced this from the original 1/2 cup; it was cloyingly sweet)
- 1 tsp pumpkin pie spice (I make my own blend, but store-bought is fine)
- 1/2 tsp vanilla extract (This is non-negotiable for depth)
- 4 large eggs (I tested with 3 and the custard was too thin to hold the bread together)
- 1/2 cup heavy cream (The original called for whole milk, but the higher fat content is what gives you that custard-like interior)
- 1 tsp ground cinnamon (For the custard, not the filling)
- 2 tbsp unsalted butter, for the pan (Clarified butter works even better as it won’t burn)
- Maple syrup and powdered sugar, for serving
The Unconventional Method That Finally Worked
I am going to walk you through the exact process I use now. It is not the method you see in the viral videos, and that is the point.
- First, make the filling. Beat the softened cream cheese with the brown sugar until completely smooth. I use a hand mixer for this because a spoon leaves lumps that burst during cooking. Add the pumpkin puree, pumpkin pie spice, and vanilla. Mix until it looks like a thick, glossy frosting. It should hold its shape when you scoop it.
- Now, the controversial part. I do not dip the assembled sandwich. I dip the individual slices of bread first. Lay out your brioche slices and let them dry on a wire rack for 30 minutes. This is the step that prevents sogginess. The bread needs to be slightly stale to act as a barrier against the custard.
- Whisk the eggs, heavy cream, and cinnamon in a shallow dish. You want a uniform, pale yellow liquid. Dip each slice of bread into the custard for about 15 seconds per side. You want it saturated but not falling apart. The bread should feel heavy but still hold its shape.
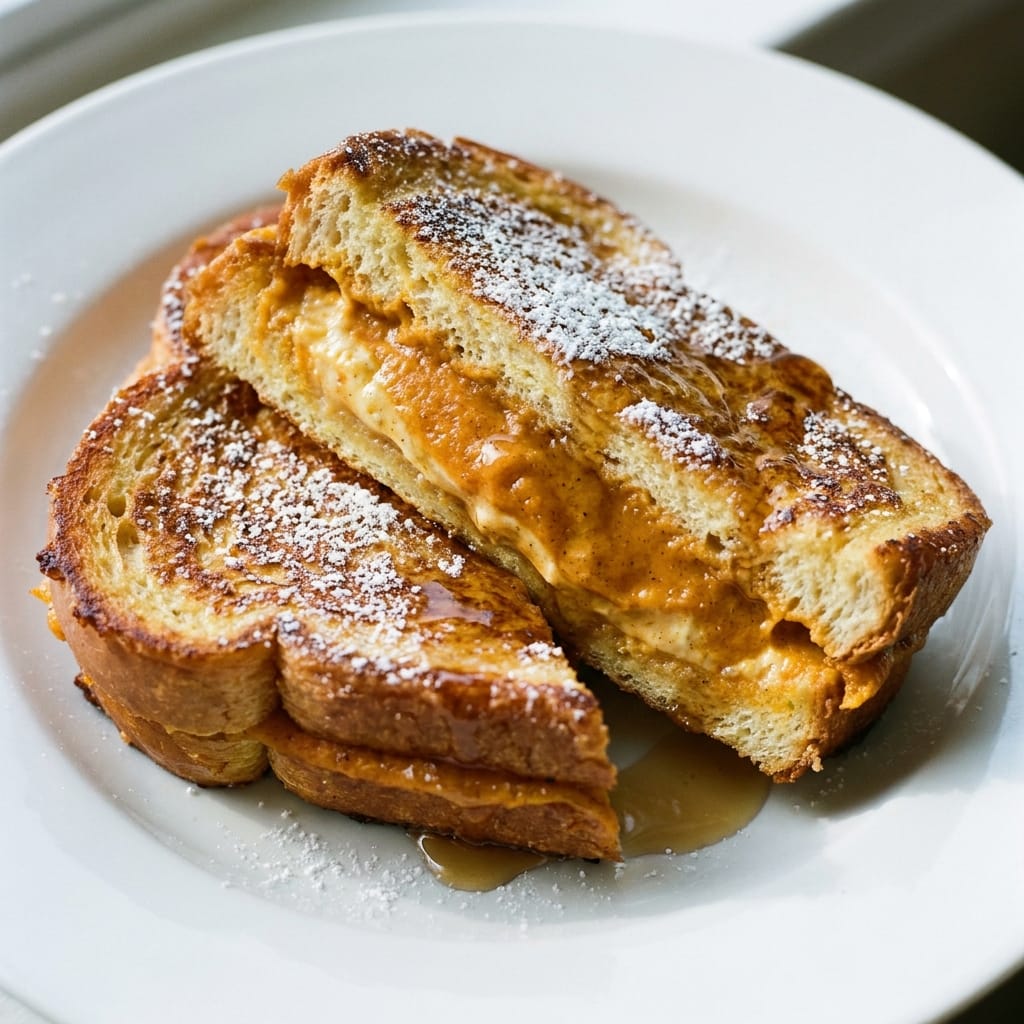
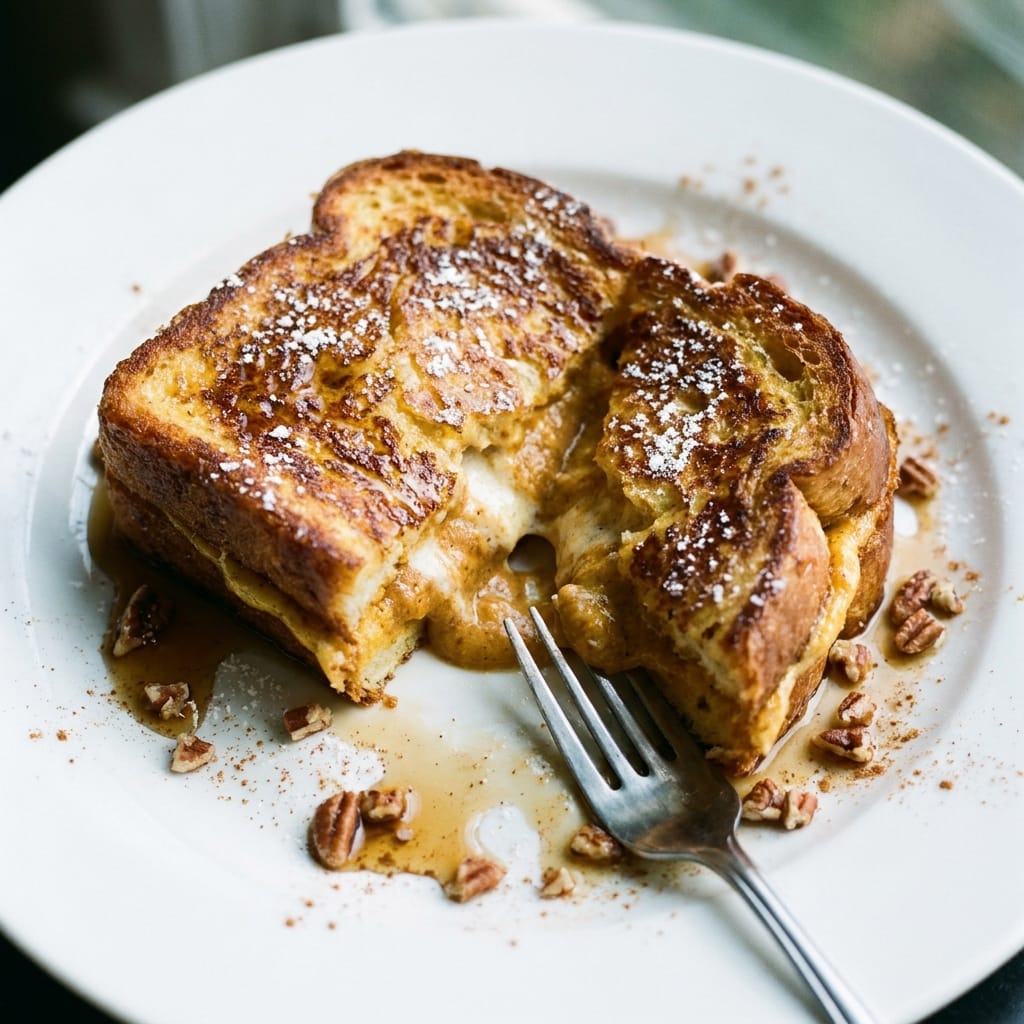
- Here is where I deviate from the norm. I assemble the sandwich after dipping. Spread a generous amount of the pumpkin filling on one slice of the custard-soaked bread, leaving a 1/2 inch border around the edges. Press the second slice on top. The wet edges of the bread will seal together like glue when they hit the hot pan. This creates a sealed pocket that keeps the filling inside.
- Get your heaviest cast-iron skillet or griddle over medium-low heat. This is not a high-heat recipe. You need gentle, even heat to cook the custard through without burning the exterior. Add a tablespoon of butter and let it foam. Place the assembled sandwich in the pan and press down gently with a spatula. Cook for 3 to 4 minutes per side. You are looking for a deep golden brown crust.
- The final step is the one nobody talks about. After flipping, cover the pan with a lid for the last 2 minutes of cooking. This traps steam and gently cooks the center of the custard and the pumpkin filling. Without this step, the middle is often raw and runny. Trust me on this.
3 Non-Negotiable Pro Tips for Making Pumpkin Pie Stuffed French Toast
The first tip is about bread density. Do not use fresh, fluffy bread. It will disintegrate. I tested with a fresh loaf of brioche and it turned to mush in the pan. Day-old bread, or even bread that has been toasted lightly, has a tighter crumb that can hold up to the custard soak. The difference is night and day.
Second, the pan temperature is everything. If your pan is too hot, the outside will burn before the egg custard sets. If it is too cold, the butter will brown and the bread will absorb excess fat, making it greasy. I use medium-low heat and I let the pan preheat for a full 5 minutes before adding any butter. This ensures the heat is distributed evenly across the surface.
Third, let the cooked French toast rest for 2 minutes before cutting into it. This is the hardest part, but it is crucial. The custard needs time to set and firm up. If you cut into it immediately, the filling will run out like lava. The resting period allows the starches to reabsorb the moisture, creating a cohesive bite. You can read more about the science of starch retrogradation if you want to understand why this works.
My Kitchen Discovery
I accidentally discovered that adding a pinch of salt to the custard mixture transforms the entire flavor profile. I was skeptical at first, but the salt amplifies the sweetness of the pumpkin and the richness of the cream without making the dish taste savory. It is the same trick used in caramel making. That tiny pinch of salt is now a permanent part of my recipe.
Servings and Timing
This recipe takes about 15 minutes of active prep time and 10 minutes of cooking time. The 30 minutes of drying time for the bread is passive, so you can do other things while you wait. This recipe yields 4 generous servings, or 8 smaller ones if you cut the sandwiches in half. I find that one full sandwich is a very filling breakfast, so I usually cut them in half and serve them stacked.
Variations and Substitutions
For a gluten-free option, I have had success using a high-quality gluten-free brioche-style bread. It is slightly more delicate, so you will want to reduce the soaking time in the custard to about 10 seconds per side. For a dairy-free version, you can substitute the cream cheese with a thick, strained coconut yogurt and use full-fat coconut milk in place of the heavy cream. The texture will be slightly different, but the flavor is still excellent.
If you want a more intense pumpkin flavor, you can add a tablespoon of pumpkin butter to the filling mixture. I tried this once and it was incredible, but it does make the filling a bit sweeter, so you might want to reduce the brown sugar by a tablespoon.
What to Serve With This
This is a rich dish, so I like to balance it with something light and fresh. A side of crispy bacon or turkey sausage works well, but for a vegetarian option, I love serving this with a simple green salad with a tangy vinaigrette. If you are looking to make a full breakfast spread, check out my [LINK: Pumpkin Cream Cheese Stuffed Muffins]pumpkin cream cheese stuffed muffins[/LINK] for a portable option. And if you want to see the other recipes I have curated from this viral trend, take a look at my [LINK: Pumpkin Pie Stuffed French Toast]listicle of the best pumpkin breakfast recipes[/LINK].
Storage and Reheating
These sandwiches do not store well in the refrigerator. The custard will weep and the bread will become soggy. If you have leftovers, the best thing to do is freeze them. Let them cool completely, wrap them individually in plastic wrap, and then place them in a freezer bag. To reheat, do not use the microwave. It will turn them to rubber. Instead, place them in a toaster oven or under the broiler at 350 degrees Fahrenheit for 5 to 7 minutes, flipping halfway through. The exterior will crisp back up while the interior stays moist.
FAQs
What happens if I skip the 30-minute drying time for the bread?
The bread will absorb too much custard and become fragile. I tested this, and the sandwich fell apart the moment I tried to flip it in the pan. The drying time is not optional; it is the structural foundation of the entire dish.
Can I use pumpkin pie filling instead of pure pumpkin?
Technically, yes, but I would advise against it. Pumpkin pie filling is already sweetened and spiced, so you will not be able to control the sugar level. The filling will become overly sweet and the texture will be more like a jam than a creamy custard. The flavor balance will be completely off.
Why did my filling leak out even though I followed the recipe?
This usually happens when the bread is too thin or the filling is too loose. If your bread slices are thinner than 3/4 inch, they will not form a proper seal. Also, make sure you are leaving that 1/2 inch border around the edges. The border is what creates the seal when it hits the hot pan.
Is it possible to make this in a waffle iron instead of a skillet?
I tried this, and it is a completely different dish. The waffle iron presses the sandwich too thin and the filling gets squeezed out. It also cooks the outside too fast, leaving the center raw. Stick to a skillet or griddle for this one.
Can I prep the pumpkin filling the night before?
Absolutely. This is actually one of my favorite time-saving tricks. The filling can be made up to 3 days in advance and stored in an airtight container in the fridge. Just make sure to let it come to room temperature before you use it, or it will be too stiff to spread.
Final Thoughts on This Viral Breakfast
I have tested a lot of viral recipes, and this one was worth the effort once I fixed the technique. The combination of the crisp, custardy exterior and the creamy, spiced pumpkin center is genuinely delicious. It is not a quick weekday breakfast, but it is a spectacular weekend project. I hope my version of Pumpkin Pie Stuffed French Toast becomes a staple in your kitchen.
Tester’s Verdict:
Difficulty: 3/5
Flavor Impact: 5/5
Weeknight Viability: 2/5
Final Word: This is a weekend-worthy breakfast that requires patience, but the payoff is a perfectly structured, flavorful dish that beats any restaurant version.
 | ||||||||||||||||||||||||||||||||||||||||||||||||||||||||
| ||||||||||||||||||||||||||||||||||||||||||||||||||||||||