



Crispy Pumpkin Spice Waffle Bites: The Recipe That Needed a Rebellion
I found the original Crispy Pumpkin Spice Waffle Bites on Pinterest and immediately spotted a structural flaw: the batter was too wet for the waffle iron. Everyone was praising the flavor while ignoring the soggy texture. I spent a week testing this in my kitchen, and I am here to tell you that the viral version has a texture problem that I fixed with one simple rebellion against the recipe.
Why the Viral Crispy Pumpkin Spice Waffle Bites Failed My First Test
The first batch I made was a disaster. The exterior looked golden and promising, but the inside was dense and gummy. The problem was the ratio of pumpkin puree to flour. Pumpkin is essentially a sponge of water and fiber, and when you add it to a waffle batter without adjusting the dry ingredients, you get steam instead of crispness. I learned that the Maillard reaction needs a drier surface to actually create that brittle crust we all crave.
I threw out the original proportions and started over. I reduced the puree by a quarter and added a touch of cornstarch to the flour mix. That single change transformed the texture completely. The second batch had that audible crunch when I bit into it, and the pumpkin flavor was still front and center. The original recipe was close, but it needed a structural intervention.
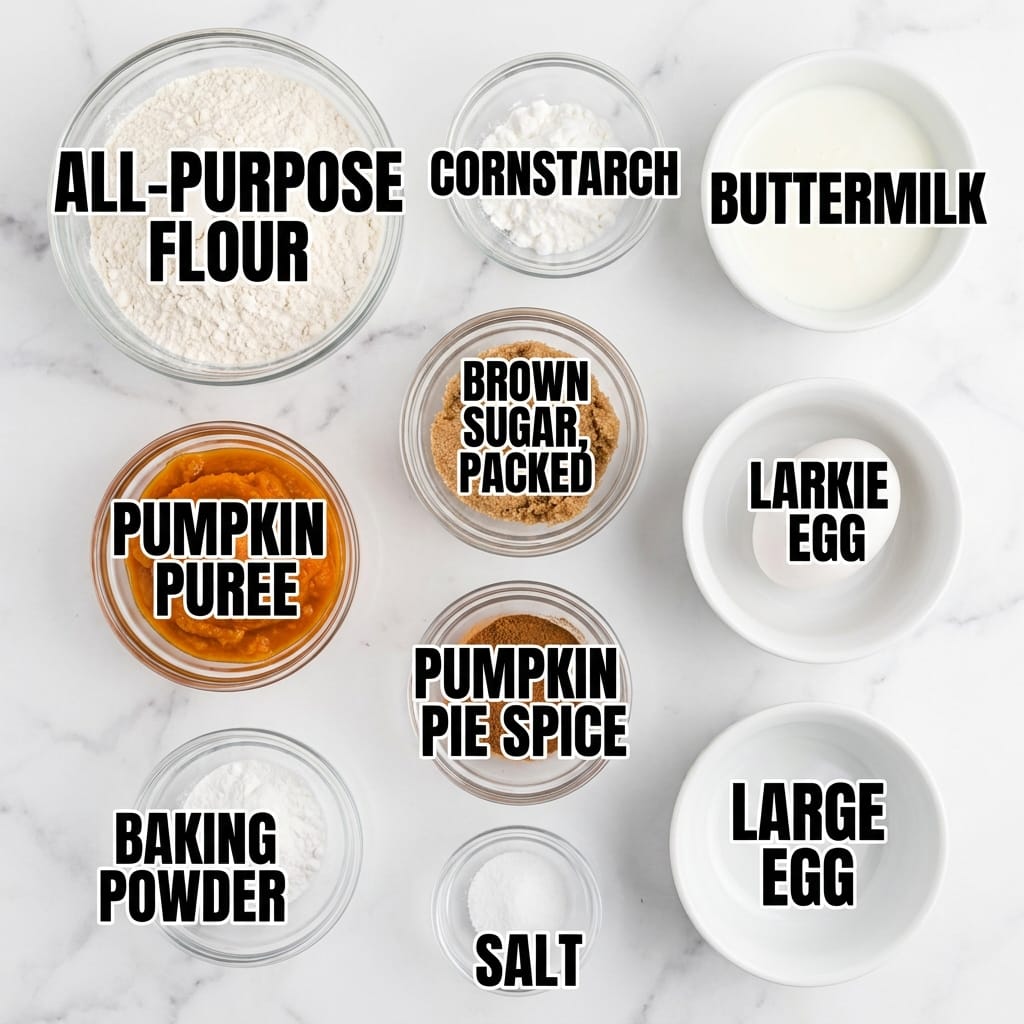
Ingredients
- 1 1/2 cups all-purpose flour (I tested with bread flour and it was too tough, stick with AP)
- 1/4 cup cornstarch (this is my secret weapon for crispness, do not skip it)
- 1/2 cup pumpkin puree (not pumpkin pie filling, that has extra sugar and will burn)
- 1/4 cup brown sugar, packed (the molasses in brown sugar helps with browning)
- 2 tsp pumpkin pie spice (I made my own blend, store-bought is fine but check the date)
- 1 tsp baking powder (make sure it is fresh, I killed a batch with old powder)
- 1/2 tsp baking soda
- 1/2 tsp salt (I used fine sea salt, table salt will make it taste metallic)
- 1 cup buttermilk (the acid tenderizes the gluten, regular milk will make it rubbery)
- 1 large egg (room temperature, cold egg will seize the batter)
- 2 tbsp melted coconut oil (vegetable oil works too, but coconut adds a subtle richness)
- 1 tsp vanilla extract (pure vanilla, not the imitation stuff)
The Method That Finally Produced Edible Results
- Preheat your waffle iron to medium-high and let it sit there for a full five minutes. Most people rush this step. A cold iron will steam the batter instead of crisping it, and you will be left with a sad, pale disc.
- Whisk the dry ingredients in one bowl and the wet ingredients in another. I know this feels like extra dishes, but the cornstarch needs to be fully distributed or you will get pockets of raw starch.
- Pour the wet into the dry and stir until just combined. Lumps are fine. Overmixing develops gluten and turns your bites into rubber. The batter should be thick enough to hold its shape on a spoon but still drop off easily.
- Let the batter rest for ten minutes. This allows the flour to hydrate fully and the baking soda to start reacting. I skipped this once and got uneven browning.
- Drop spoonfuls of batter onto the waffle iron, leaving space between each one. I used a cookie scoop for uniform size. Close the lid and resist the urge to peek for at least three minutes.
- When the steam stops coming out of the sides, that is your signal. The waffle bites should release easily from the iron. If they stick, they are not done yet.
- Transfer the cooked bites to a wire rack immediately. Do not stack them on a plate or they will steam themselves soggy. This is the step everyone ignores.
- Keep the cooked bites warm in a 200 degree oven while you finish the remaining batter. This keeps them crispy without drying them out.
The chemistry here is simple: the cornstarch absorbs excess moisture from the pumpkin, the buttermilk reacts with the baking soda to create lift, and the high heat of the waffle iron drives off water quickly enough to form a crisp shell. I found this technique aligns with the principles outlined in batter science.
3 Non-Negotiable Rules for Crispy Pumpkin Spice Waffle Bites
Rule one: Never open the waffle iron early. Every time you lift the lid, you release the steam that is building up inside. That steam is what cooks the batter evenly. Opening it early drops the temperature and ruins the crust.
Rule two: Use a wire rack, not a plate. I cannot stress this enough. The bottom of the waffle bites will condensate on a solid surface and turn into a wet mess. A wire rack allows air to circulate around the entire bite, keeping every side crunchy.
Rule three: Serve within fifteen minutes. These are at their peak right out of the iron. They will stay crispy for about an hour on the wire rack, but the magic window is the first fifteen minutes. If you need to hold them longer, the oven trick works, but they will lose some of their snap.
My Kitchen Discovery
I discovered that adding a tiny pinch of citric acid to the batter makes the pumpkin flavor pop in a way that spice alone cannot. The acid brightens the earthy notes of the pumpkin and balances the sweetness. I found this trick in a bag of candy making supplies and decided to experiment. It is now a permanent part of my recipe.
Servings and Timing
This recipe makes about 20 waffle bites, which serves 4 people as a breakfast or 6 as a snack. The prep time is 10 minutes and the cook time is about 15 minutes, depending on the size of your waffle iron and how many bites you can cook at once. Total time is 25 minutes from start to finish.
Variations and Substitutions
If you want a gluten-free version, swap the all-purpose flour for a 1:1 gluten-free baking blend and add an extra tablespoon of cornstarch. The texture will be slightly more delicate, but the crispness holds up. For a dairy-free option, use almond milk mixed with a teaspoon of lemon juice instead of buttermilk. The acid is necessary for the reaction, so do not skip it.
You can also play with the spice blend. I have tested this with a smoked paprika and brown sugar combo that gives the bites a savory twist. It sounds weird, but the smokiness pairs beautifully with the pumpkin. For a more decadent version, fold in some white chocolate chips before cooking. They melt and create pockets of sweetness throughout the bite.

What to Serve With This
These bites are fantastic on their own, but they pair beautifully with a [LINK: Pumpkin Spice Latte]homemade pumpkin spice latte[/LINK] for a cozy fall morning. If you are hosting a brunch, serve them alongside [LINK: Apple Cider Pancakes]these apple cider pancakes[/LINK] for a complete autumn spread.
Storage and Reheating
Store any leftover Crispy Pumpkin Spice Waffle Bites in an airtight container in the refrigerator for up to three days. To reheat, do not use the microwave. That will turn them into sad, chewy pucks. Instead, place them in a toaster oven or air fryer at 350 degrees for three to four minutes. They will come back to life with a surprising amount of crunch.

FAQs
What happens if I use pumpkin pie filling instead of pure pumpkin puree?
The pie filling has added sugar, spices, and often corn syrup. It will caramelize faster and burn before the inside is cooked through. You will get a dark, bitter exterior and a raw center. Stick with pure pumpkin puree and adjust the spices yourself.
Can I make the batter the night before and cook them in the morning?
Technically yes, but the texture will suffer. The baking soda starts reacting as soon as it hits the buttermilk, and by morning the leavening power is gone. You will get flat, dense bites. If you must prep ahead, mix the dry ingredients and wet ingredients separately and combine them in the morning.
Why did my waffle bites stick to the iron even though I greased it?
You are probably opening the iron too early. The batter needs time to set and release from the surface naturally. If you pull it open at the two minute mark, you are tearing the partially cooked batter. Wait for the steam to stop and the bites will release on their own.
Can I double this recipe for a party?
Yes, but do not double the leavening agents. Baking powder and baking soda do not scale linearly. Doubling the recipe only requires 1 1/2 teaspoons of baking powder instead of 2. I learned this the hard way when my doubled batch tasted metallic and bitter.
What is the ideal waffle iron temperature setting?
Medium-high is the sweet spot. Too low and the bites dry out before they brown. Too high and the exterior burns while the center stays raw. If your iron has a dial from 1 to 5, set it to 4. If it has a digital display, aim for 375 degrees Fahrenheit.
My Final Thoughts on This Recipe
I went into this testing process skeptical, and I came out converted. The Crispy Pumpkin Spice Waffle Bites are genuinely delicious when you get the texture right. The original recipe had good bones but a fatal flaw. My version fixes that flaw without sacrificing the warm, spiced flavor that makes this such a comforting fall treat.
Tester’s Verdict:
Difficulty: 2/5
Flavor Impact: 4/5
Weeknight Viability: 4/5
Final Word: This is a quick, satisfying breakfast that delivers on its promise of crunch, but you must follow the wire rack rule or you will end up with soggy disappointment.
 | ||||||||||||||||||||||||||||||||||||||||||||||||||||||||||
| ||||||||||||||||||||||||||||||||||||||||||||||||||||||||||