


My Frugal Kitchen Test of This Pickled Cherry Tomatoes, Red Onion, and Cucumber Recipe
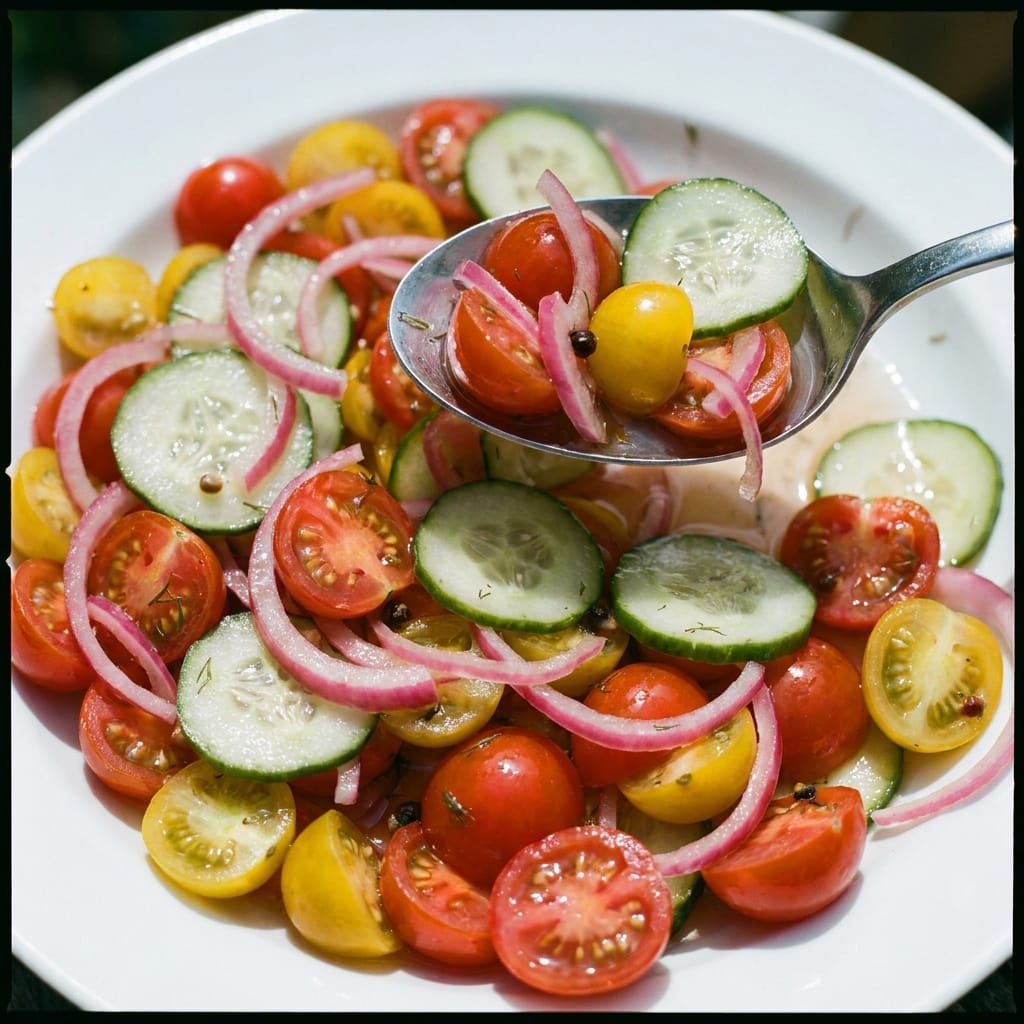
I found this Pickled Cherry Tomatoes, Red Onion, and Cucumber Recipe pinned a dozen times on Pinterest, each caption promising a “fancy” appetizer that cost pennies. As someone who refuses to pay $14 for a tiny jar of artisanal pickles, I had to see if the hype was real. I grabbed the cheapest produce I could find at my local market and spent a weekend testing every variable to see if I could recreate that high-end tang without the high-end price tag.
The result is a jar of pure, budget-friendly magic. This Pickled Cherry Tomatoes, Red Onion, and Cucumber Recipe is my new secret weapon for making a humble cheese board look like it cost a fortune.
Why This Pickled Cherry Tomatoes, Red Onion, and Cucumber Recipe Beats the Fancy Jars
My first attempt was a disaster. I followed a popular version that called for equal parts water and vinegar, which resulted in a sharp, one-dimensional brine that tasted like battery acid. The cucumbers turned mushy within hours, and the red onions turned an unappetizing shade of blue. I almost gave up.
The second time, I approached it like a scientist. I learned that the ratio of acid to water is the single most important factor. Too much vinegar and you lose the sweetness of the tomatoes; too little and you risk bacterial growth. According to the basic science of pickling, the acid concentration needs to be high enough to preserve the vegetables safely, but balanced enough to let the natural flavors shine. I settled on a 1:1 ratio of water to vinegar, but I added a surprising amount of sugar to round out the edges. That was the turning point.
The other secret was salting the cucumbers and onions first. This is a technique I stole from my grandmother’s coleslaw method. It draws out excess water, preventing the final brine from becoming diluted and watery. This step alone took the texture from “soggy mess” to “crisp and snappy.”
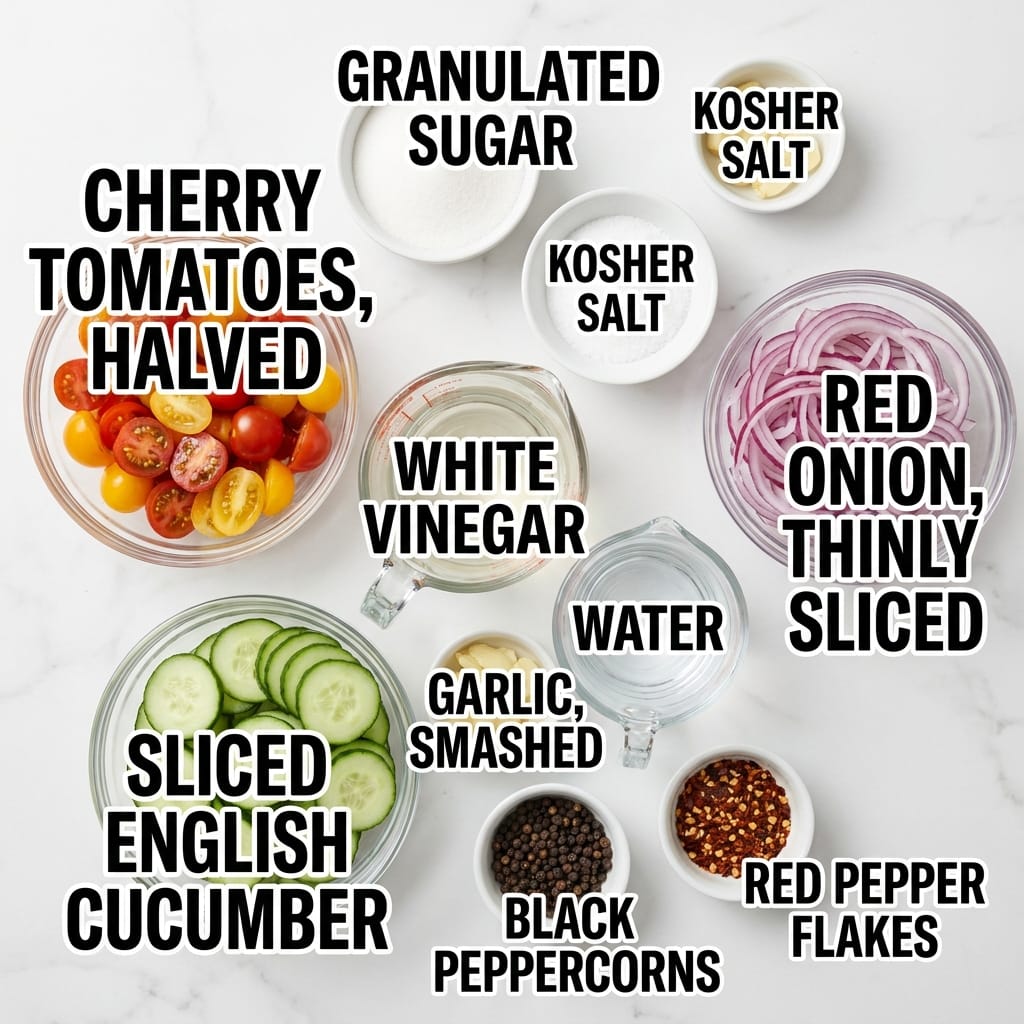
Ingredients
- 1 pint cherry tomatoes, halved (I used the ugliest, cheapest ones I could find; they tasted identical to the fancy heirloom ones here)
- 1 English cucumber, sliced into thin rounds (Regular cucumbers work, but you must peel them first to avoid a bitter bite)
- 1 medium red onion, thinly sliced (I used a mandoline for paper-thin slices which pickle faster)
- 1 cup white vinegar (Distilled white vinegar is the cheapest and cleanest tasting for this)
- 1 cup water
- 2 tablespoons granulated sugar (This is non-negotiable. It balances the acid perfectly)
- 1 tablespoon kosher salt (Do not use table salt here, it makes the brine taste metallic)
- 1 teaspoon black peppercorns
- 2 cloves garlic, smashed (This adds a savory depth that makes it taste “restaurant quality”)
- 1 bay leaf (Optional, but it adds a subtle herbal note I love)
The Method That Finally Worked (And Saved My Budget)
- First, I tossed the sliced cucumbers and red onions in a bowl with a teaspoon of the kosher salt. I let them sit for 20 minutes while I prepared the rest. This is the “sweating” step. You will see water pooling at the bottom of the bowl. I rinsed them quickly and patted them completely dry. This prevents the final pickle juice from becoming watery and weak.
- While those rested, I combined the vinegar, water, sugar, and remaining salt in a small saucepan. I heated it over medium heat, stirring occasionally, until the sugar and salt fully dissolved. I did not let it boil. A gentle simmer is enough. Boiling can drive off the vinegar’s sharpness, leaving the brine flat.
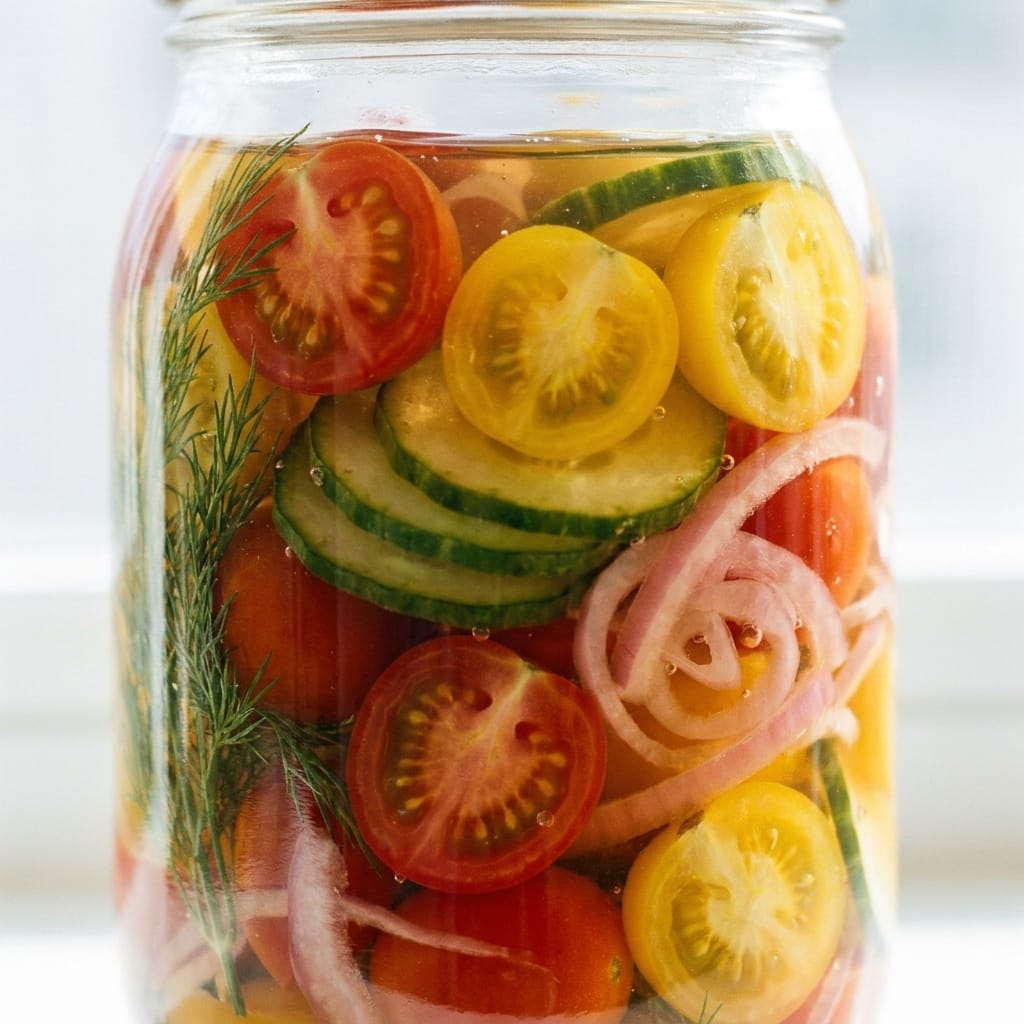
- I packed the halved cherry tomatoes, dried cucumber, and onion into a clean glass jar. I layered them rather than just dumping them in, which helps the brine reach every nook and cranny. I tucked the smashed garlic cloves and bay leaf in the middle.
- I poured the hot brine over the vegetables, making sure they were completely submerged. I used a chopstick to gently poke around the jar to release any trapped air bubbles. This is crucial. Air bubbles can harbor bacteria and cause the top vegetables to discolor.
- I let the jar cool on the counter for about an hour, then I sealed it and put it in the fridge. I tasted it after 4 hours, and it was good. But the real magic happened after 24 hours. The flavors melded together into something that genuinely tasted like it came from a $12 jar at a specialty store. The process is simple, but the patience is the key ingredient. For a deeper dive into safe water bath canning, if you ever want to preserve these long term, check out this guide on canning techniques, but for fridge pickles, this method is perfectly safe.
3 Pro Tips for This Pickled Cherry Tomatoes, Red Onion, and Cucumber Recipe
- Cut Everything the Same Thickness. If your cucumber slices are thick and your onions are paper thin, they will pickle at different rates. The thin onions will be done in 2 hours, while the thick cucumbers will still taste raw. I aim for everything to be about 1/8 inch thick.
- Don’t Skip the Sugar. I know it sounds weird to add sugar to a savory pickle, but it is the secret to making the tomatoes taste sweeter and more vibrant. The sugar doesn’t make it sweet; it just balances the vinegar so the fruitiness of the tomato can shine through.
- Use a Plastic or Wooden Spoon to Pack the Jar. Metal can sometimes react with the acid in the vinegar, giving the pickles a slightly metallic taste. I always use a chopstick or a plastic spoon to avoid this.
My Kitchen Discovery
I discovered that chilling the jar for exactly 48 hours is the sweet spot. At 24 hours, the flavors are good, but at 48 hours, the garlic and peppercorns really infuse the liquid. However, after 5 days, the cucumbers start to lose their crunch. So, this is a recipe meant to be eaten within the first week, not stored for months. It forces you to enjoy it quickly, which is fine by me.
Servings and Timing
This recipe yields about 3 cups of pickled vegetables, which serves roughly 6 to 8 people as a side or appetizer. The active prep time is only about 15 minutes, but you need to factor in at least 4 hours of chilling time for the flavors to develop. The total time from start to fully pickled is about 24 hours for the best results.
Variations and Substitutions
I have made this with apple cider vinegar instead of white vinegar, and it adds a lovely fruity note that pairs well with pork or grilled meats. For a spicy kick, I added a sliced jalapeño to the jar, which gave it a wonderful heat without overwhelming the other flavors. If you are watching your sugar intake, you can substitute the sugar with a zero-calorie sweetener like monk fruit, but you will need to use slightly less, as it is sweeter than sugar. This is naturally gluten-free and vegan, making it a great addition to any [LINK: Vegetarian Recipes]vegetarian appetizer spread[/LINK].
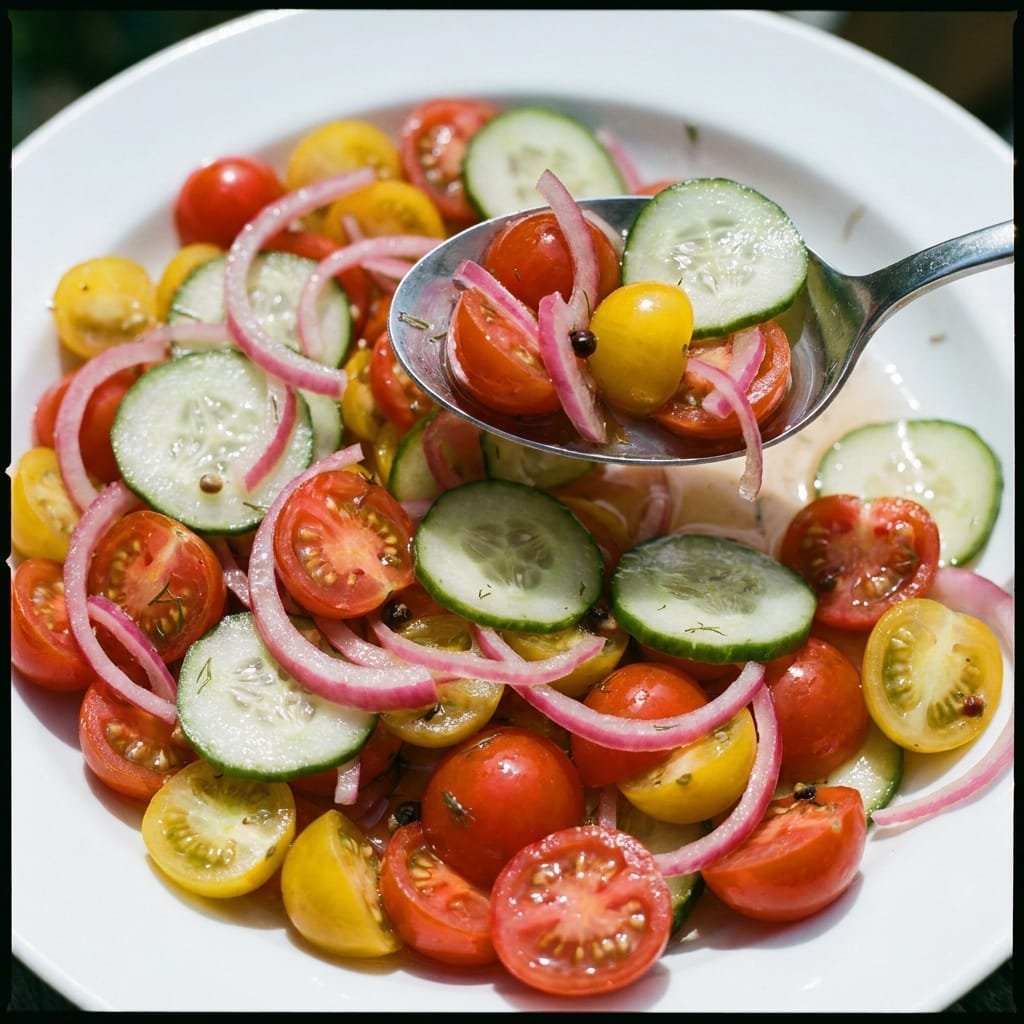
What to Serve With This
These pickles are incredibly versatile. I love serving them alongside a simple [LINK: Grilled Cheese Sandwich]grilled cheese[/LINK] to cut through the richness. They are also phenomenal on top of tacos or as a bright, acidic counterpoint to a fatty piece of salmon. Honestly, I have been eating them straight out of the jar with a fork as a snack. They also make a fantastic hostess gift if you put them in a pretty jar with a ribbon.
Storage and Reheating
These pickles are best served cold, straight from the fridge. Do not reheat them, as it will destroy the crunch. Store them in an airtight container in the refrigerator for up to 2 weeks. The tomatoes will soften slightly over time, but the flavor will continue to deepen. If you notice the brine becoming cloudy, that is a sign of bacterial growth, and you should discard the batch. As long as you keep them submerged in the brine, they should stay fresh and delicious.
FAQs
What happens if I forget to sweat the cucumbers and onions first?
The brine will become watery and diluted, resulting in a less flavorful pickle. The vegetables will also be less crisp because the excess water will interfere with the pickling process. It is a step you should not skip.
Can I use a different type of tomato if I don’t have cherry tomatoes?
You can use grape tomatoes, but they have a thicker skin and are less sweet. I found that halving them is essential, as it allows the brine to penetrate. Larger tomatoes will turn to mush, so stick to the small ones.
My jar is a little too small for all the vegetables. Can I pack them down?
Yes, you can gently pack them down, but do not crush them. The hot brine will soften them slightly, allowing them to settle. Just make sure the brine covers everything completely.
I only have rice vinegar. Will that work?
Rice vinegar is much milder and sweeter than white vinegar. It will work, but the pickle will be less tangy and more delicate. I would reduce the sugar to 1 tablespoon if you use rice vinegar to avoid it becoming too sweet.
Is it safe to leave the jar on the counter overnight to pickle faster?
No. Leaving it at room temperature can promote the growth of harmful bacteria. The pickling process requires the cold environment of the refrigerator to be safe. Always refrigerate after the jar has cooled to room temperature.
My Final Verdict on This Budget-Friendly Pickle
For less than five dollars, I created a condiment that tastes like it came from a gourmet deli. This Pickled Cherry Tomatoes, Red Onion, and Cucumber Recipe has officially earned a permanent spot in my weekly meal prep. It is a brilliant way to use up vegetables that are about to go bad, and it impresses everyone who tries it. I highly recommend making a double batch, because it will disappear faster than you expect.
Tester’s Verdict:
Difficulty: 1/5
Flavor Impact: 4/5
Weeknight Viability: 5/5
Final Word: This is a foolproof, zero-cook recipe that transforms cheap vegetables into a luxurious, tangy treat that everyone will think you spent a fortune on.
 | ||||||||||||||||||||||||||||||||||||||||||||||
| ||||||||||||||||||||||||||||||||||||||||||||||